≡ Menu

Hello folks, I am the owner of Western Appliance Repair in Boise Idaho.  I am writing another blog article of some of my repair jobs in Boise.  I hope this article can be useful to you or others when confronting problems with your appliances.

On a recent appliance repair service call we had a dishwasher that was leaking water out the left front corner of the dishwasher during the wash cycle.  The floor was damaged significantly in this location but I was not able to duplicate the leak. This is frustrating but not unusual.  I reached my hand up under the door and felt wetness, bingo!  That was enough for me to search for a culprit and decide which way to proceed.

The first thing to inspect is the outer door seal for tears or damage.  It looked good.  I pulled the lower spray arm off and inspected and this is what I found-a separation at the plastic seam.  When this break, or separation happens, water will spray out of the breach and into the water that accumulates on the bottom of tub during the wash cycle.  This creates waves which travel to the lower drip panel of door and splashes out.  Problem may not show itself until late in the cycle when the plastic has softened and the breach has become larger.  This can make things difficult to diagnose.

If you need help with your appliance, please feel free to call Western Appliance Repair in Boise Idaho.  Thank you,

Rich

Broken Refrigerator Wiring at Freezer Door

Hello Boise and Meridian customers of Western Appliance Repair.  Thanks for reading!  Today I’d like to talk about a unusual refrigerator repair for a customer in Boise.  They complained of a non functioning icemaker.

Many modern refrigerators have the icemaker located in the freezer door.  While this is very convenient it does pose problems sometimes.  If the engineering design or assembly is not done properly you have problems like we have here – broken wiring at the bottom of the door.

The wiring at the bottom of the door goes through a lot of stress when the freezer door is opened and closed constantly during normal use.  This refrigerator wiring gets twisted and turned each time the door is moved.  This can be a big challenge for designers.  Occasionally the twisting of the wiring results in breakage.  This breakage can occur in 20 years or it can occur in 2.  Or , it may not occur at all.  I would say that mostly it does not happen.  Our refrigerator is 25 years old and we’ve had no problems. 

Here is a two-year-old refrigerator.  The outer wire insulation is cut right through and the wiring was severed from rubbing against the sharp edge.  The red-wire in the picture carries the DC voltage to the icemaker motor.  Without this voltage you will not get ice.

This repair left us few options other than to resolder the wire and hope it lasts a few more years.  For a permanent fix the door would have to be replaced which wasn’t an option due to the expense.  In a case like this the manufacturer should be contacted due to bad factory design or assembly.

Hello to all Boise Appliance Repair customers!  Here is again is another update coming to you from Western Appliance Repair.

These pictures were taken a few days ago and I thought this would be an interesting post since it is a common problem – excessive lint buildup on the dryer blower wheel. 

The dryer blower wheel  is  very important and provides the air-flow needed to adequately circulate air in the dryer drum and remove the moisture by blowing it out the back of the dryer, into the house duct, through the outside wall (or roof), and to the outside air.  When you get excessive lint buildup on the blower wheel it will drastically cut down on the air flow and you may not even see any noticeable lint on the lint screen.  Heated air will stay inside of the dryer drum and clothes will not dry properly.

An interesting thing is what I found in the blower along with the lint ball.  I found a dryer sheet stuck in with it.  I see this almost every time I do one of these repairs.  I believe the catalyst is the dryer sheet itself.  Once it gets caught in the blower wheel the lint builds up more and more and forms a snowball type of affect.

How does this happen?  My best guess is that the lint-screen was not installed or not installed properly before running dry cycle.

Hope this helps folks!

Venting your Dryer Properly.

Hello Folks, my name is Rich and I am the owner/operator of Western Appliance Repair in Boise and Meridian Idaho.

  • In this blog page I’d like to discuss dryer vent hoses.  The dryer vent hose can be made of Vinyl, Flex Aluminum or Rigid Aluminum.  I’ll discuss the benefits of each one of these.  Vinyl dryer hoses should never be used in my opinion.  They degrade too quickly and are very susceptible to leaks.  They just don’t appear to withstand the heat generated from the dryer.  They are not recommended by appliance manufacturers.
  • Flex dryer vent hoses are my preference.  Although they are NOT recommended by some manufacturers they are easily installed and attached to appliance and ducting.  They withstand heat very well and are very useful when it comes to moving your appliance out from the wall.  These flexible vents are most common.
  • Rigid dryer vents: Appliance manufacturers appear to recommend the hardest and most durable vent they can to protect themselves from lawsuits.  There are big problems with rigid vents however.  I find rigid vents crushed in on about 80 percent of my dryer repair calls.  Many times they are so crushed that they are restricting air-flow to the point of damaging the dryer.  Many other times the vent is just not installed properly.  The clamps that are used to hold the vent to the dryer and ductwork are not strong enough.   Thus, many times I find the vent hose disconnected and venting air directly into the washroom.  The installation of these rigid vents is difficult from many homeowners and even professionals.  So, while the rigid material itself can withstand heat and resist punctures more than the other types, the numerous installation and crushing failures of these vents make them more of a problem than ever.
Washer inlet valve filter

When washing machines don’t perform up to expectations it can be a very stressful situation, understandably.  There are many operations during the wash cycle that are not clearly evident and when the something goes wrong it can be a subtle annoyance or a catastrophic event.  The water-fill operation is what I’ll be talking about here.

The common complaint I receive when water is not filling properly, or not enough, is that the washer is taking too long to run or locks up during the cycle.  When your washer fills too slowly the washer will “wait” for longer and longer periods for the water to reach the proper level and to satisfy the water fill sensor.

One way to check for this is too choose “cold” fill and stand and watch the washer fill.  A flashlight can aid in this inspection.  If you are satisfied that the cold water fill is filling properly, abort the cycle and restart it – this time choosing “hot” wash.

This is important to check each water supply because sometimes problems arise during the “rinse” cycle – where only the cold water is used.

One of the most common problems I find is the water supply valve screen as shown in the picture.  These can clog with rust and debris especially if your house’s water is supplied from a well.

Here is a picture of a washer inlet valve screen.  It is made of plastic mesh and is located inside the inlet valve nipple located in the back of the washing machine.  It can be removed with a pair of needle nose pliers and cleaned and washed in running water.

These valve screens are used to filter small particles such as sand, from entering the internal mechanical parts of the inlet valve.  If small particles get past this screen it can wreak havoc on the valve and can lead to a costly repair.  They are especially important if your home water supply comes from a well.  In that case small particles of sand can clog up these screens.  If you have a old home you may get rust and corrosion in the water that can clog these screens. 

Thank you for reading!

Rich – Western Appliance Repair in Boise and Meridian Idaho

As a seasoned appliance repair engineer in Boise I see many different problems with appliances.  Some are difficult to identify because there many things need to be looked at – aside from potential faulty components.  In this appliance repair service call an intermittent water leak was the problem.  When I say intermittent I mean about 3 months ion between occurrences.

In the first visit the dishwasher was cycled numerous times and inspected fully.  No leaks were evident – not one drop.  The second “leaking dishwasher” call was three months later at the same house.  After inspecting for water leaks and cycling the dishwasher repeatedly no leaks were found.  We then looked inside dishwasher and saw detergent SUDS.  These suds were still evident inside dishwasher after numerous test cycles without adding dishwasher detergent.

Detergent suds are cause by one thing and one thing only – the addition of the wrong type of soap, liquid or handsoap, into the tub.  This can be caused by cross contamination such as soaking pots and pans in the sink with liquid soap and then putting them into the dishwasher.

Suds cause water leaks by seeping out the door and through the float switch orifice.

Hello, my name is Rich and I am the owner-operator of Western Appliance Services.  We do our repair work mainly in Boise, Meridian, and Eagle Idaho however, we do repair visits in Star and Kuna.

This picture shows what a defrost thermostat looks like.  It’s the part with the two wires coming from it, one pink and the other orange.  This part is what is installed on all refrigerators and its purpose is to prevent the evaporator heating element from getting stuck in the ON state.  If that happens, it could be a fire hazard.  As with many things sometimes they fail.  The result of that failure is in the background.

The frost that has accumulated on the refrigerators evaporator is the direct result of the defrost thermostat going bad.  Most refrigerators are set to go into a defrost mode every eight hours to prevent the buildup we see here.  When the defrost thermostat is bad it does not allow electrical current to the heater element.   When there is no automatic defrost then the frost will choke off air flow to the fresh food section of the refrigerator.  This is something we see every couple of month.  If you have a refrigerator problem, Western Appliance in Boise Idaho can fix it.  Thank you,

Rich

Things that can Damage to your Washer’s Drain Pump

This damaged drain pump is the result of an Allen wrench getting stuck in the pumps impeller. You wouldn’t think a wrench would wind up in a washer would you? Ha ha, Yes, it’s one of many items I find when disassembling appliances due to malfunctioning parts. I find .22 bullets, keys, necklaces, bracelets, etc -the list goes on. I don’t think there will every be an invention to keep these items from getting inside a washing-machine’s internal workings but there IS one thing that DOES work – check clothes pockets for items before loading them in your two-thousand dollar washer :-).
This washer drain pump has seen better days. The white part of the pump is called the impeller and as you can see it has one of the three blades broken and a chunk taken out of it’s base. We carry these pumps on our appliance repair service trucks so we can make quick work out of most repairs. So, if your washer is making noise and won’t drain – we can fix it. Call us anytime at 208-863-3702.

Hello Folks, I know we haven’t wrote in a while about some of our unusual appliance repair service calls, so, better late then never.
I was called over to troubleshoot a refrigerator that had excessive ice buildup in the freezer. Boy were they right! I was expecting to see a little ice buildup but this surprised me. The ice bucket was attached to the ice so firmly that I had to use my steamer to dislodge it without damaging it. Once this was removed a clearer picture emerged about what was causing this.

Once the ice bucket was removed from the freezer a slow inspection was done. Sometimes it’s better to relax and inspect and take your time at it. If you take your time and look closely most of the time the problem will reveal itself. In this instance I noticed the ice-maker was hanging down the back wall at a unusual angle. Looking further, I saw that the ice-maker water spout on the back wall was dislocated from the ice maker. When the ice-maker switched on the water valve, the water, instead of pouring into the refrigerators ice maker was spraying on to the shelves.

How did this happen? I don’t know. Oh boy. Well, once we cleaned everything up, cleared the ice, re attached ice maker all was well. Hopefully for years to come.

When the dreaded OE error code shows up on your LG washer’s display it’s time to be concerned – your washer may need in-depth repair from a appliance repair professional.

Most front load washers have a main wash cycle that lasts about 20 minutes.  When the washer is finished washing the clothes it will drain the dirty water out of the tub so it can proceed to the rinse cycle.  If the water in the tub is not pumped out of the tub within a calculated period of time the washer display will show OE.

The first thing our Boise customers should know is that there is a quick and easy check you can do to – drain and clean the drain trap.  Most of these drain traps are located on the bottom of the front panel on the left or right-hand side.  Rotate the cap counter-clockwise and remove it.  Be careful though because water will come out.  Having a wet-vac simplifies this messy operation.

If the trap is clean then you may need to call an appliance repair technician to replace the drain pump.  The picture above shows how we gain access to the drain pump.


In this video I will show you how to install a garage refrigerator kit.
If you have a Frigidaire or Kenmore top freezer that doesn’t seem to freeze your food very well in cold conditions, this may help resolve the problem.
If you feel that this job may be at a level too difficult for you to do on your own then please call us.  We can install these and get your garage refrigerator running good again.

This washer bellow has a small rip in the bottom lip, as shown in this picture. This is caused by improper loading. The clothes should be pushed all the way into the drum before closing the door. If clothes get  caught between the bellow and the door,  the bellow to rip. It will always get a chunk taken out at the bottom.
Always use proper loading techniques when loading your washer.  This is a very expensive fix so we want to avoid this if we can.  If an accident does happen, we can fix this pronto.  Merry Christmas All!!

20131223-100826.jpg

This washer tub was filled with stinky water and the pump was in-operable. We drained it, cleaned the trap, pulled the pump, and inspected it. There was black debris all up inside of it needed to be replaced.  I installed a factory-new part and it now works great. Another happy Boise customer.

When a GE Front-Load washer experiences pump problems, the symptoms can be unusual.  The washer can lock up in the middle of a cycle or over-fill with water.

20131205-144026.jpg

Ice maker not making Ice - Maytag Kenmore

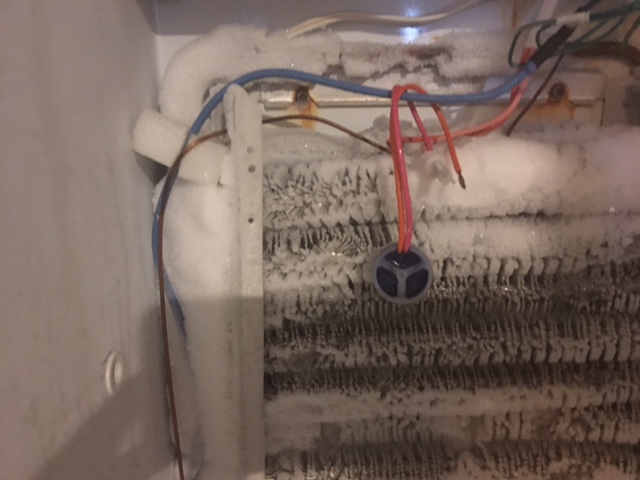
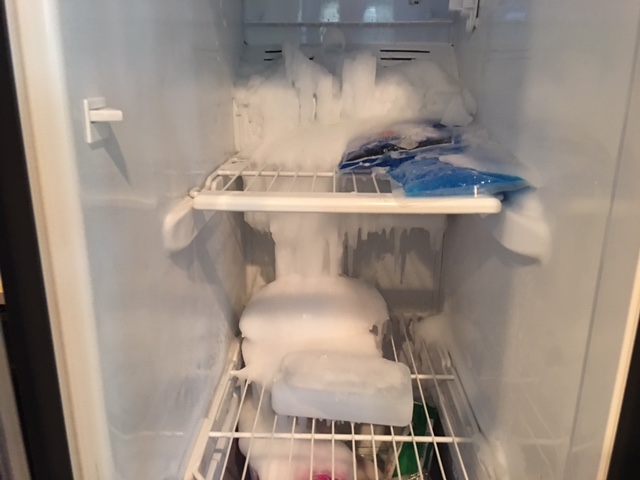
I went out on a Boise call today.  The customer’s complaint was, ice maker not making ice.  When I get a call like this I immediately think that the ice-maker is bad so I always bring a new one out with me to the job-site, expecting to replace.  Nothing is all that it seems on some appliance repair calls.  Upon inspection of the Maytag refrigerator’s ice-maker water spout, it appeared ice was clogging the spout.  A pretty good clog to say the least  I manually applied 120 vac to the valve and the water would not come out the water tube.  Bingo!

The water valve was leaking water slowly into the ice maker supply tube and freezing over a period of time.  First, let us obtain the valve (s).  We have part numbers 12001892 and 61005626.

Ice maker not making Ice – Check Valves

Both valves will need to be replaced.  Some Boise appliance repair technicians will elect to replace only one of these, but I prefer to replace both to avoid call-backs.  In this case, hard water and calcium build-up was apparent. To ensure a quality repair/installation both valves were replaced.


refrigerator water supply valve

First step in this ice maker and valve repair job is to turn off the water supply to the refrigerator.  A word of advice here, if the valve hasn’t been turned on/off in a long time, it may be locked-up or leaking.  In this case, I could not turn the handle.  It was completely locked up solid.  Using a wrench, it wouldn’t move.  If excessive force us used to turn the valve, we risk flooding the house and causing floor damage.  We don’t want this.  A reputable Boise Plumber was called in to replace the valve.

Once the under-sink valve has been replaced and we have water shut off to the refrigerator, it’s time to get to work.

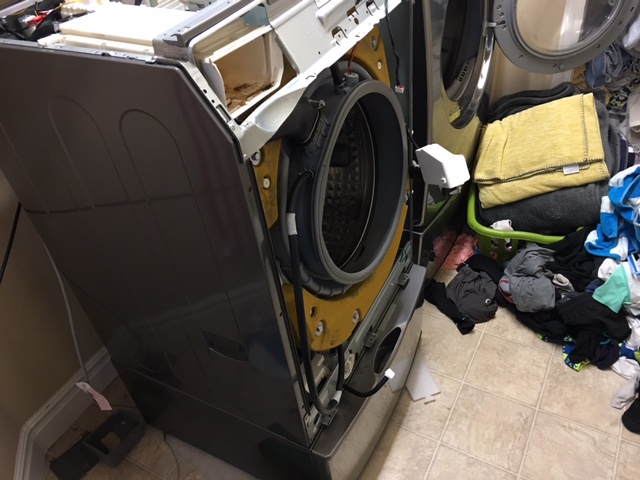
Pull the back panel off the bottom rear of refrigerator.  There should be about 10 hex bolts that hold this in place.

Remove hex nut that holds the valve assemblies in place.  This should be located on the right hand side of refrigerator, when looking from the back.

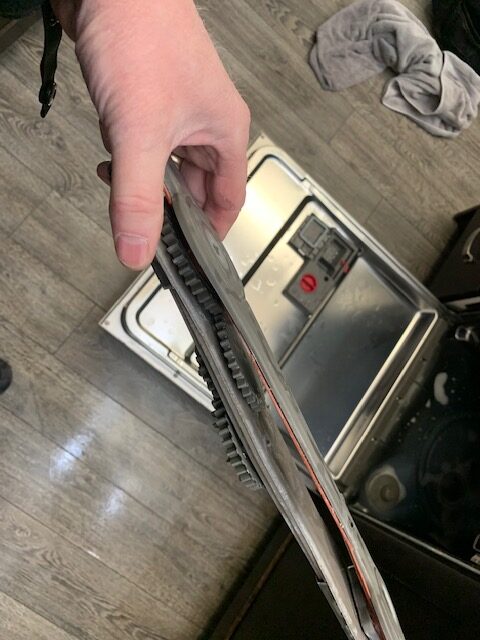
Gently pull the valve assembly outward.  It should look like this:

icemaker supply valveThe new Maytag valve will have push/seal connections.  This is preferable and they seal quite well.  I have yet to see one of these fittings leak, unless exposed to freezing conditions.   In Boise, this will happen if the refrigerator is stored in a storage facility over winter.

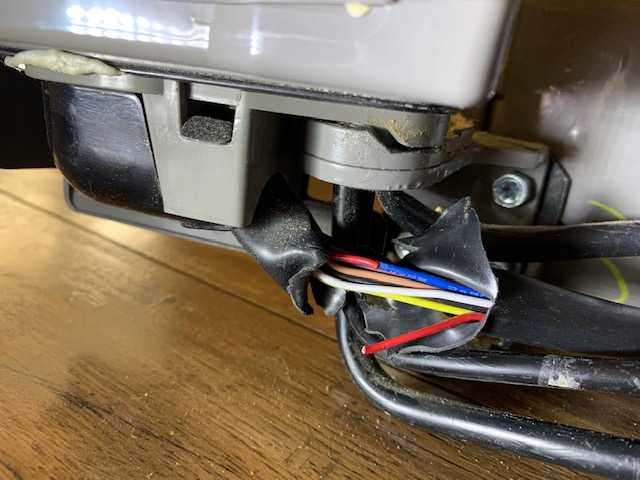
Follow the instructions that are included in the box and install the water lines being sure to remember which lines go to where.  What I find easiest is to remove one line at a time and install the new one immediately.

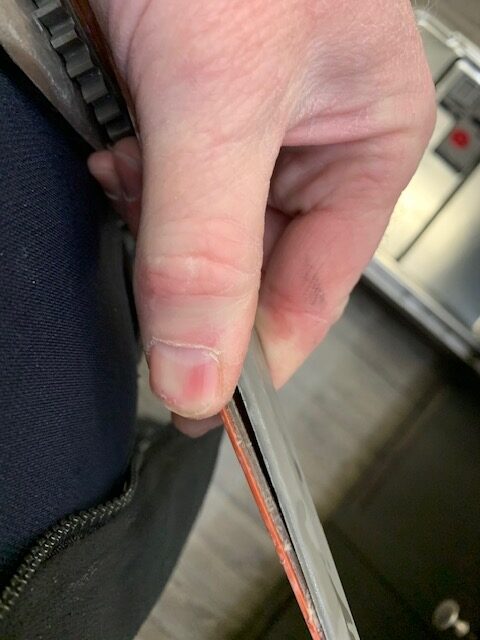
The ends of the water lines will need to be clipped if needed to fit in new valves.

Ice Maker and Valve Testing

Reinstall in reverse order.  Plug power cord in and manually test valve and ice maker for proper operation.  Ice Maker ice production rate will be eight cubes per three hours.

Facebook
Twitter
Pinterest
LinkedIn